Welcome to our dub techno tutorial, the key to dub techno is to use only a few elements (a couple of chords, a kick and a hi hat), filtered down low, and and to only used sparsely, then fill up the space with wide stereo delays and reverbs, then tweak the filters and space fx throughout the track. I cover with step by step instructions and screen shots how to make dub techno chords…
Here’s what we’re making:
See also: All our drum pattern guides including Techno Drum Patterns, Studio Brootle Dub Techno Chord Rack, Minimal Microhouse Drum Pattern, Studio Brootle 909 Sample Pack, Dub Techno Tutorial Ableton, Techno Rumble Ableton (a.k.a. Rumble Kick), our guide to Ableton’s Echo, Free Techno Kick Sample Pack. Valhalla Supermassive Tutorial (with presets), Free Techno Chord Arp Ableton Rack.
You can also find our paid packs at our Shopify store —> here.
Buy our packs at our Shopify store, use this code for 25% off: SBCOM25STWD

Dub Techno Tutorial: 4 Ingredients…
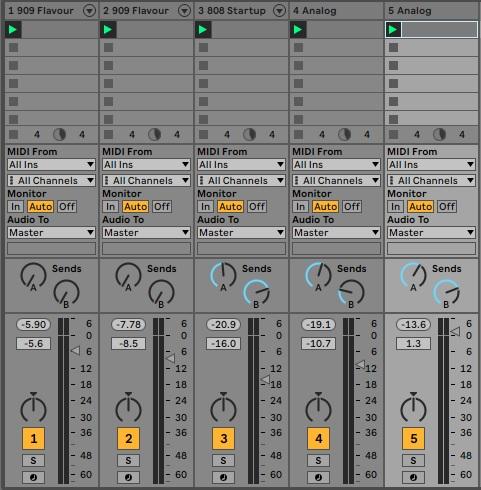
There are only 5 channels here, (it’s called 4 ingredients as the kick and bass are the same sample, just processed differently). It has really simple midi, and everything is done with fx processing and automation.
See the video for a quick run down of how this loop was made….
Step 1 – Filtered Down Kick
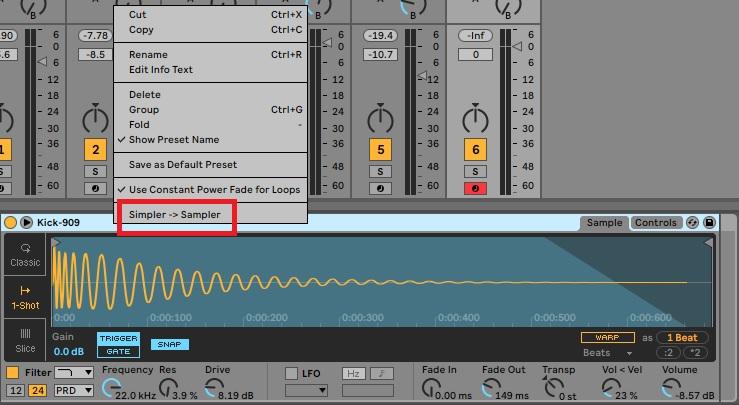
You want something like a 909 kick but take the aggression off it with a filter. I add the 909 Flavour Kit Ableton kit as it has a great kick, it loads in a drum rack. I set the bpm to 120.
Then I convert the Simpler to a Sampler as it’s filter has some great distortion settings.
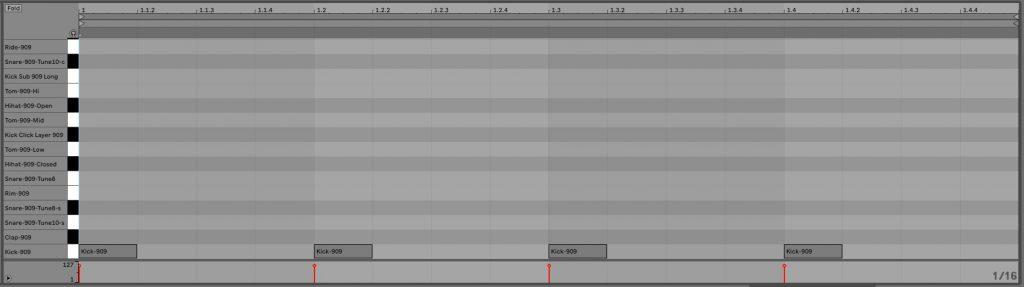
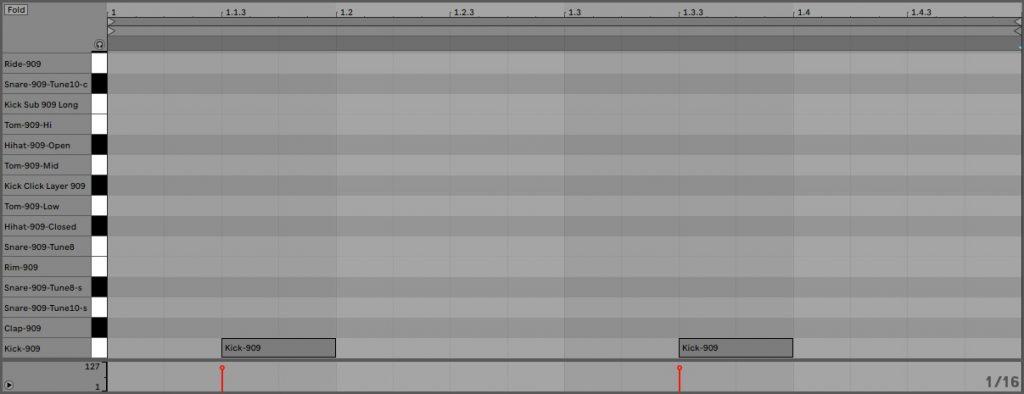
Set up a simple 4 to the floor kick pattern.
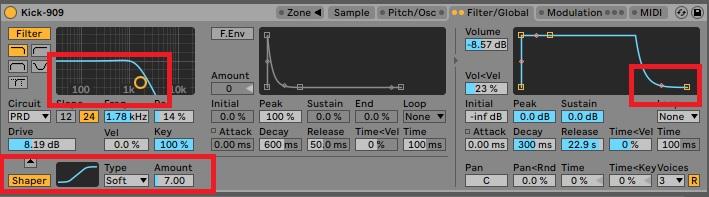
And then set the filter and distortion settings. I lower the filter and add some Shaper, making the kick less punchy. I also shorten the release on the amp envelope so that the kick is not so long. With dub techno you want the elements to be filtered down and feel like they’re hiding.
The kick should sound like this:
Buy our preset and sample packs—> at our Shopify store , use this code for 25% off: SBCOM25STWD
Step 2 – Sub Bass
You don’t always hear a lot of separate sub in some dub techno tracks, but I like it so I’m including it!
All I’m going to do here is copy the kick channel I made before and move it off the beat, using the following midi:
Then filter it down and add delay and reverb then filter it down again so only the lows remain. The delay keeps it rhythmical.
Firstly cut the first, aggressive, part of the kick off leaving just the subby tail:

In the screen shot you can see I’ve filtered the kick more, and taken off the shaper distortion and added delay.

Then add reverb to smear it a bit (turn Stereo down to keep the bass mono), and add a drum buss to process it all together, before filtering it all down so it is just a sub bass.

It should sound like this:
Buy our preset and sample packs—> at our Shopify store , use this code for 25% off: SBCOM25STWD
Step 3 – Hi Hats
You want a simple pattern of washy delayed out hats. I use the Hihat-909-Open hat from the 808 Startup Kit with a simple off beat pattern:
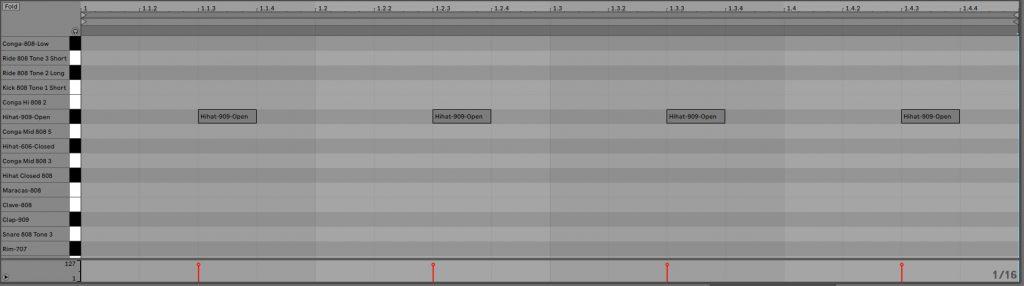
I convert it to Sampler and add drive at the filter. Then add some Erosion for a bit crushed style effect, and some Echo with delay and reverb.

With the kick, sub and hats together it should sound like this:
Buy our preset and sample packs—> at our Shopify store , use this code for 25% off: SBCOM25STWD
Step 4 – Set Up Sends For More Space FX
I set up two sends, these will be used to add reverb and delays and can be tweaked and automated. The first is a simple reverb which is then overdriven slightly for more noise:
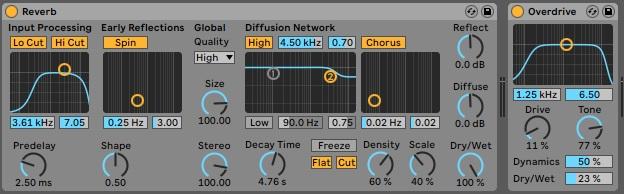
The second is an Echo with ping pong delays, so sending a channel to this will start to make it sound really wide. You can see it is 100% wet and there is a decent amount of delay Feedback and Reverb on it
Then I send the hi hats to them to taste to delay and reverb them even more.
Step 5 – Chord 1
Now time for the star of the show, the chord! (Since making this guide I have made a dub techno chord rack, you can download that here).
Start a new channel and add a hit, I used this midi:
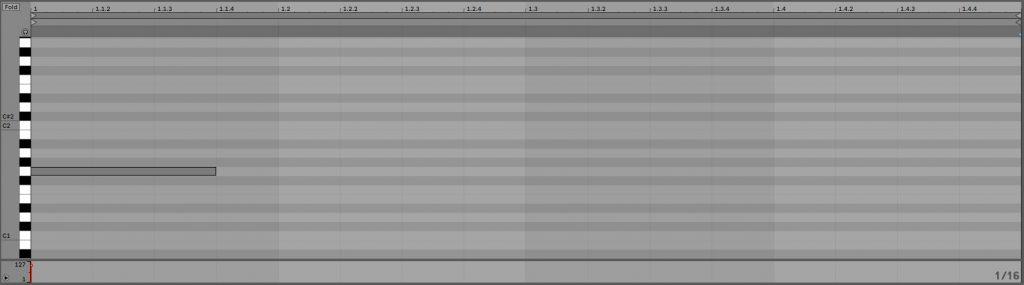
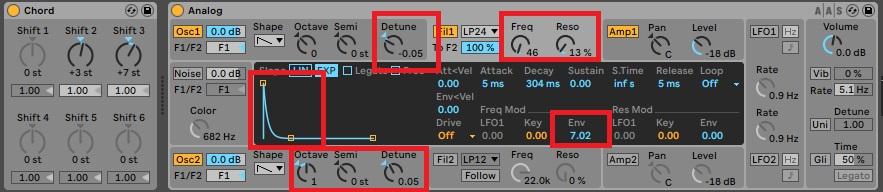
Add a Chord unit and set it as in the image below so it plays a minor chord (0, +3 and +7). This means that any one note you play will trigger a chord.
Then add Analog and detune the oscillators.
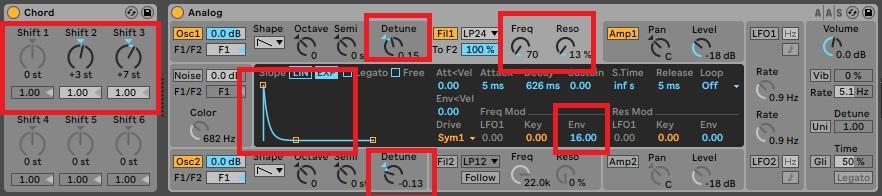
Turn the filter down and set a tight envelope (shorted the decay time). Change the ‘Env’ to adjust the envelope modulation amount, I set it to 16.
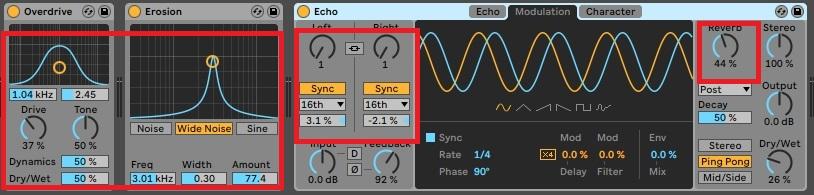
Then you can process it, I used Overdrive, Erosion and then Echo with the delays slightly off on each side (you can see in the pic one is up 3.1% and the other down 2.1%).
It should sound this now, it’s starting to take shape!
Step 6 – Chord 2
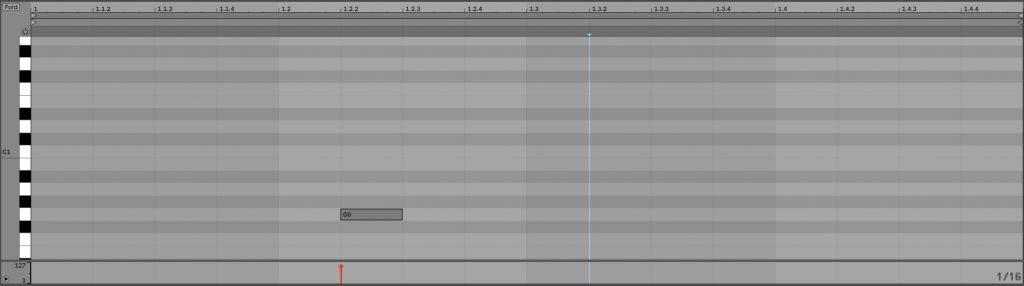
I then copy the synth and play another note an octave down:
I then changed some of the settings, including making the 2nd osc an octave higher, and making the envelope tighter:
I also changed the processing, removing the distortion and adding two Echo units.

Here’s the second chord on it’s own, it should sound really minimal, but that’s the idea, as you can automate and tweak the filter next…
Buy our preset and sample packs—> at our Shopify store , use this code for 25% off: SBCOM25STWD
Step 7 – Automate
Add the sends to the 2 chords:
And the whole loop should be sounding good now…
Then I’ll automate the mixer sends on the hats and the chords as well as the filter cut off of the two chords and you can get something like this:
Use a midi controller or even the mouse if you can and record he automation it in live so it is really loose.
Buy our preset and sample packs—> at our Shopify store , use this code for 25% off: SBCOM25STWD
Downloads
This article is a step by step guide, I’ve made the main chord rack available here: Studio Brootle Dub Techno Chord Rack, there’s also the older tutorial I did which has a rack in it too: Dub Techno Tutorial Ableton. For drum samples, you can get our free samples here.
You can also find our paid Dub Techno packs at our Shopify store —> here.
Buy Our Preset Packs here:
Click the image for 25% off: